
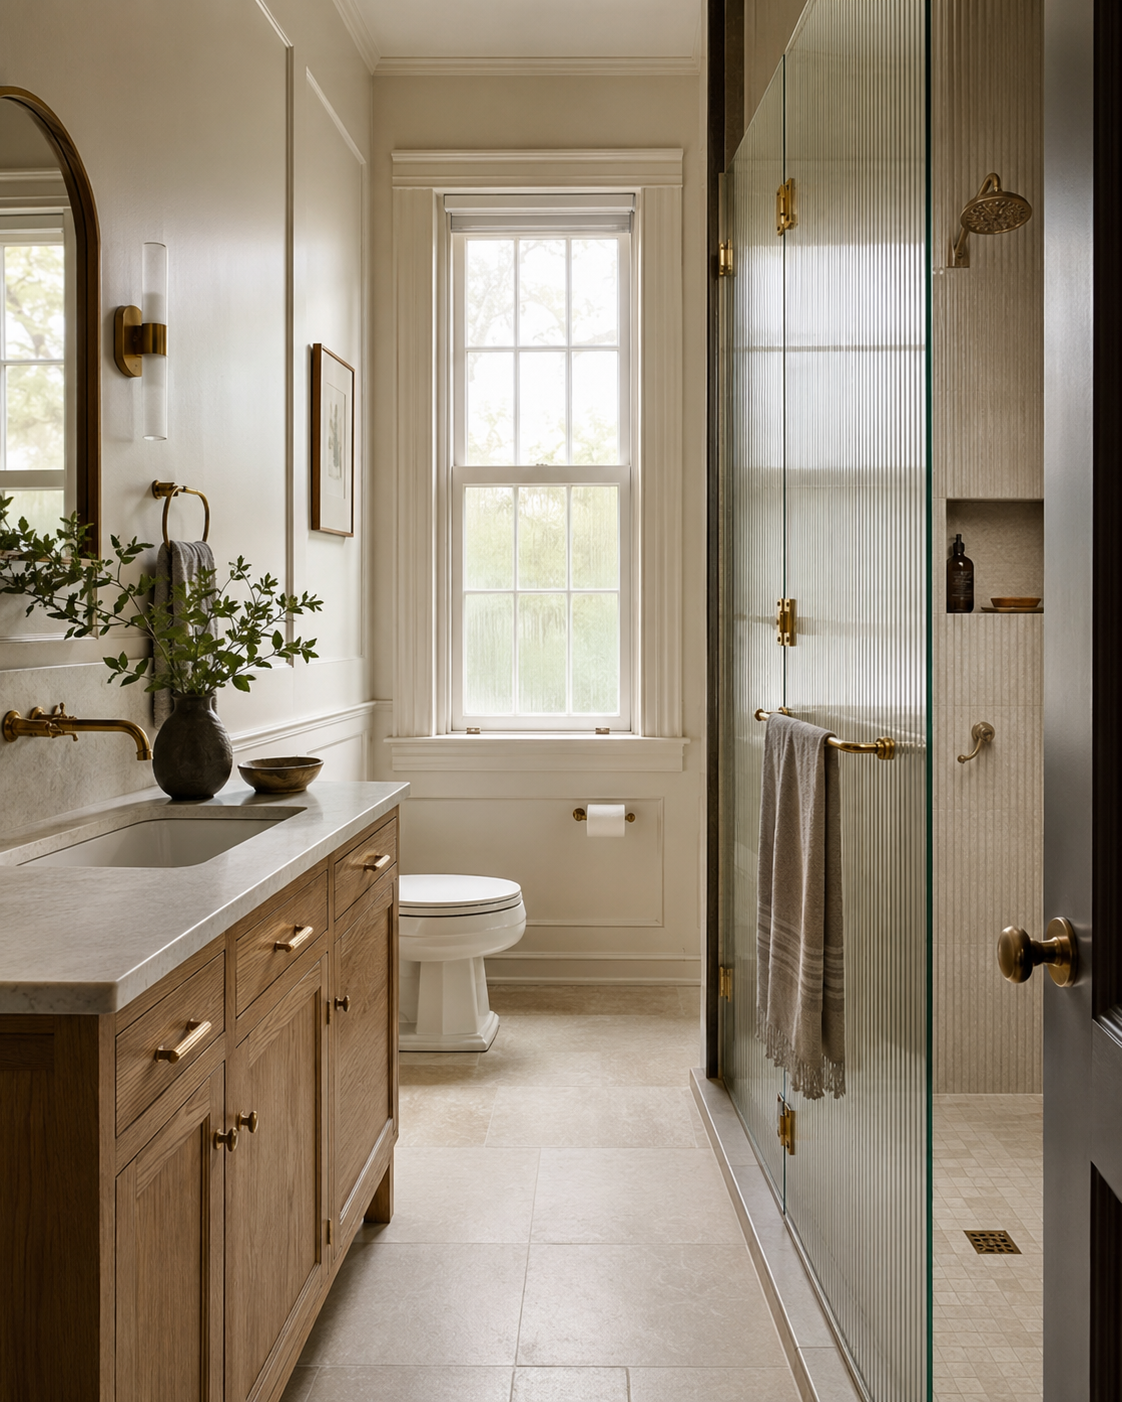
Begin with performance
A bathroom is a small room with a demanding job. Water, humidity, daily cleaning and frequent use expose weak details quickly. Before discussing tile patterns, define what is not working: poor ventilation, limited storage, an awkward shower entry, insufficient light or surfaces that are difficult to maintain.
These performance goals should lead the scope. The finish selections can then support a room that works reliably rather than simply photographs well.
Confirm what will stay and what will move
Keeping fixtures in their current locations can simplify a project, but it should not be an automatic decision. If the existing layout creates a narrow path, leaves unusable floor area or prevents practical storage, compare the value of a layout change with its added work.
Document the toilet, vanity, tub or shower, door swing, window, heating elements and clear walking areas. Check how drawers and doors open. A modest shift can solve a daily problem, while an unnecessary move can consume budget without improving the room.
Treat water management as a system
Tile and grout are finish surfaces, not the complete water-management strategy. The scope should address the substrate, waterproofing approach, shower base, transitions, penetrations and how water is directed toward the drain.
- Define the wet area before selecting wall finishes.
- Coordinate niches, benches and glass attachments with waterproofing.
- Plan transitions where tile meets painted walls or flooring.
- Include access needs for valves and other serviceable components.
Ask how each layer connects to the next. The best details are usually the ones that make the finished room feel quiet and inevitable.
Plan ventilation, power and lighting together
A fan should be sized and located for the room, then connected to a practical control strategy. Lighting works best in layers: useful light at the mirror, general illumination and, where appropriate, softer light for evening use.
Map outlets, switches, vanity fixtures and medicine cabinets before walls are closed. This coordination prevents a mirror from colliding with a sconce or an outlet from landing where it is awkward to use.
Make storage specific
"More storage" is too broad to guide a design. List what needs to be stored and where it is used. Daily items may belong at the vanity. Towels need depth and ventilation. Cleaning supplies may need a taller compartment or a different room entirely.
Specific storage planning can make a smaller vanity more effective than a larger one filled with poorly organized space.
Finish with the overlooked details
A complete scope includes wall repair, paint, trim, accessories, floor transitions, sealants and final hardware. It also identifies responsibility for mirrors, shower glass and owner-supplied fixtures.
When these pieces are considered early, the bathroom reads as one resolved room. When they are left until the end, even beautiful tile can feel disconnected from the details around it.
Turn the wish list into a written definition of success
A strong bathroom plan needs a clear definition of what success will look like after the room is back in use. Homeowners often begin with a list of products or saved photographs, but those references do not explain which daily problems have priority. Write a short statement describing how the finished space should work, how it should feel and which frustrations must disappear. Then list the changes that are essential, the improvements that would be valuable and the ideas that are optional. This simple hierarchy gives every later conversation a reference point.
Use the definition of success to evaluate the scope, not only the appearance. A proposal may include beautiful tile, grout, vanity, counter, plumbing trim, glass, hardware and paint, yet still leave an awkward route, weak storage or an unresolved surface condition. Another proposal may look less exciting on paper but address the underlying needs more completely. When priorities are explicit, it becomes easier to compare those differences, allocate money intelligently and avoid allowing a late decorative choice to displace work that protects long-term performance.
Document existing conditions before pricing the final scope
Existing homes rarely behave like blank plans. Walls may be out of square, floors may change height, previous alterations may conceal older materials and utility routes may not match assumptions. Before a final scope is accepted, the planning process should record room dimensions, framing, floor condition, fixture clearances, drain and vent locations, exterior-wall conditions and available exhaust paths. Photographs, measurements and written notes create a shared record of what can be observed and what still needs confirmation. That record is especially useful when several trades will touch the same area.
Some conditions cannot be confirmed until selective opening or demolition. The scope should distinguish known work from allowances or contingencies instead of pretending every concealed condition is certain. This does not mean the project must remain vague. It means the estimate should explain what has been verified, what assumption supports the current price, how an unexpected condition will be documented and who authorizes a change. Honest uncertainty is easier to manage than false precision.
Build one coordinated scope instead of a collection of trade quotes
The visible work in a bathroom depends on supply and drain lines, electrical protection, ventilation and the complete wet-area assembly. Those elements need to be planned alongside layout, waterproofing, tile, fixtures, ventilation, lighting and storage, not treated as unrelated tasks. A layout decision may change utility locations. A new material thickness may affect trim, doors or transitions. An opening created for one trade may need to remain accessible until another inspection or installation is complete. If each decision is made separately, the gaps appear at the edges.
A coordinated scope names the connections. It identifies demolition, protection, preparation, hidden work, finish installation, repairs and final completion in the order they need to occur. It also assigns responsibility for purchasing, delivery, field verification and owner-provided products. This is the difference between a list that says what will be installed and a plan that explains how the room will be delivered as a complete result.
Separate the base scope from allowances and options
Homeowners need to know which costs are fixed by the defined work and which depend on selections or conditions that are not final. The base scope should cover the work that is reasonably understood. Allowances should be attached to a clear quantity or product category, not used as a broad placeholder for missing planning. Optional alternates should show the cost and schedule effect of a genuine choice, such as expanding the work area or upgrading a material.
When reviewing an allowance, ask what it includes. A product allowance may cover the item but not shipping, tax, accessories, installation materials or labor. A labor allowance may assume a particular existing condition. Record those assumptions so later comparisons remain fair. The goal is not to eliminate every variable. The goal is to make variables visible early enough that the budget can absorb them without forcing rushed decisions.
Create a budget that includes the edges of the project
Budgets often focus on the central installation and overlook the work required to make its edges feel finished. A complete bathroom budget may need to include protection, removal, disposal, delivery, preparation, permits when applicable, related electrical or plumbing, trim, paint, hardware, accessories, cleaning and correction of adjacent surfaces. It may also need a contingency for concealed conditions, especially where previous work or moisture is suspected.
Do not treat contingency as a target to spend. It is a reserve that protects the project when a reasonable unknown becomes visible. Keep design upgrades separate from condition-related changes so the reason for every adjustment remains clear. A budget with named categories is more useful than one large total because it lets homeowners understand where money is doing structural work, performance work and purely visual work.
Make selections in dependency order
Not every selection has the same deadline. Decisions that affect rough dimensions, utility requirements, blocking, ventilation or material thickness usually need to be resolved before decorative details. For this project, early decisions normally include layout, shower or tub format, waterproofing details, tile layout, vanity, plumbing fixtures, lighting and accessories. Later decisions may include paint nuances, accessory placement or small styling details, provided they do not change work already completed.
Create a selection log with the item, model or finish, supplier, expected lead time, required-on-site date, approver and current status. Confirm specifications rather than relying on a product name alone. Dimensions, handedness, voltage, trim kits, installation requirements and compatible accessories can change the scope. A selection is not complete because it has been added to a cart; it is complete when the team has the information needed to coordinate it with the room.
Confirm lead times before setting the construction sequence
A project schedule is only credible when important products can arrive before they are needed. Custom, special-order and back-ordered items should be identified during planning. Delivery dates should include a reasonable margin for inspection and correction. Starting demolition while a critical item remains uncertain can create a long period of disruption or force an inferior substitute when the room is already open.
The practical sequence is to approve the design, confirm specifications, order long-lead products, verify delivery information and then align the start date with realistic availability. Materials also need a safe storage plan. Large or fragile products should be inspected promptly, while finishes that require acclimation should follow manufacturer guidance. Good scheduling is not about making the calendar look short. It is about keeping the work moving once the household has committed to disruption.
Understand permits, code and professional review
Permit and code requirements depend on the location and the exact work. Changes involving structure, plumbing, electrical, ventilation or other regulated systems may require permits, inspections or licensed specialists. Ask the contractor to identify likely requirements during scope development and confirm responsibility for applications, scheduling inspections and closing permits. Homeowners should avoid relying on a generic statement that a project is only cosmetic when the actual work reaches behind the finish.
Older homes can also present conditions that deserve specialized evaluation, such as suspected hazardous materials, recurring moisture, unusual wiring or movement that may have a structural cause. The general remodeling plan should pause where expertise is needed. Bringing in the right professional is not a failure of planning; it is part of responsible planning. The final record should preserve permits, inspection results, product information and any maintenance instructions relevant to the completed work.
Plan the sequence from protection to final touch-up
A well-written schedule follows dependencies. It begins with protection and site setup, then moves through removal, investigation, corrections, hidden systems, inspections when required, substrate preparation, installation, finishing and final cleaning. For bathroom work, the exact order may change, but the principle remains the same: do not cover work that still needs verification, and do not install a vulnerable finish before rough activity around it is complete.
Ask how the team will communicate the weekly plan and what milestones need homeowner approval. Useful milestones may include layout confirmation, approval of work revealed after demolition, rough-location review, sample or mockup review and a pre-completion inspection. A schedule should also acknowledge drying, curing and acclimation time. Those intervals are part of the work even when no one is visibly installing material.
Prepare the occupied home for construction
Remodeling affects more than the room inside the contract boundary. Plan access, working hours, parking, deliveries, restroom use, pets, children, security and the route used to remove debris. For this project, discuss alternate bathroom access, water shutoffs, dust control and the sequence for owner-supplied fixtures. Identify what the homeowner will move and what the contractor will protect. Valuable, fragile or irreplaceable objects should be removed from adjacent areas before work begins.
Dust-control measures should match the work, but no active construction area is completely free of dust or noise. Temporary barriers, floor protection, negative-air equipment when appropriate and regular cleaning can reduce migration. The homeowner and contractor should agree on which areas remain usable and when utilities may be interrupted. Clear expectations reduce stress because the household knows what normal disruption looks like and when a condition needs attention.
Use samples and mockups to prevent expensive misunderstandings
Words such as warm white, smooth, centered or minimal can mean different things to different people. Samples make expectations observable. Review tile, grout, vanity, counter, plumbing trim, glass, hardware and paint together under the actual light in the home. Where layout matters, use drawings, taped outlines, dry layouts or a small mockup. The sample should be identified and retained as the reference for installation.
Mockups are especially valuable at transitions and terminations. They can confirm how a pattern meets an edge, how two materials change height, how trim returns or how a repair blends into an existing surface. The purpose is not to design every inch in the field. It is to resolve the details most likely to look improvised if everyone relies on assumptions. A short review before installation can prevent removal and rework later.
Define quality in observable terms
Quality becomes easier to manage when the scope describes what will be reviewed. For this project, important outcomes include planned tile cuts, consistent grout joints, properly sloped wet areas, secure accessories, balanced lighting and neat sealant joints. Manufacturer instructions, approved plans and retained samples provide additional references. These standards help the contractor perform internal checks and give the homeowner a fair basis for the final walk-through.
Natural materials, handmade products and existing surfaces can include variation. Discuss acceptable variation before installation rather than after it. The same applies to repairs: the expected level of finish should reflect lighting, viewing distance, texture and the extent of the surrounding surface. The goal is not a promise of abstract perfection. It is a shared understanding of what a professionally completed result should look like and how it will be evaluated.
Establish a communication and decision process
Every project needs one reliable path for questions, approvals and records. Decide who represents the homeowner, who represents the contractor and how quickly each party should respond to time-sensitive decisions. Important selections, field changes and cost approvals should be documented in writing. A conversation can begin by phone, but the outcome should be recorded so the team is not working from different memories.
Regular updates should cover completed work, the next planned steps, decisions needed, deliveries and anything that may affect cost or timing. Homeowners do not need a stream of technical detail without context. They need to understand what changed, why it matters and what choice is required. A consistent update rhythm also makes it easier to surface small concerns before they become larger corrections.
Handle changes without losing control of the project
Changes generally come from one of three sources: an owner-requested improvement, a concealed condition or a correction needed to meet the agreed scope. Those categories should not be mixed. Before extra work begins, a change record should describe the condition or request, the proposed response, the cost, the schedule effect and any decision deadline. Photographs are useful when the change relates to a concealed condition.
Urgent protective work may occasionally need to proceed before every detail is priced, but the reason and authorization should still be documented. Avoid making a series of informal field requests that never reach the budget. Small additions accumulate, and they may also interrupt the sequence. A disciplined change process protects the homeowner from surprise and protects the contractor from being asked to deliver unrecorded work.
Compare contractor proposals by scope, not only total price
Two proposals with different totals may not describe the same project. Compare protection, demolition, disposal, preparation, hidden-system work, materials, installation, finish repairs, permits, supervision, cleanup and closeout. Note every exclusion and allowance. Ask how the contractor handles concealed conditions, who coordinates the trades and how changes are authorized. Insurance, licensing where required, references and relevant project experience also deserve review.
Pay attention to the questions a contractor asks. Careful questions about existing conditions, adjacent rooms, product requirements and household needs often indicate that the team is thinking beyond the visible installation. Be cautious when a complex project receives a confident fixed answer before anyone has reviewed the site or specifications. A useful proposal should make the work easier to understand, even if it cannot remove every unknown.
Keep a homeowner decision file
Create one location for the signed scope, proposal, drawings, selections, product specifications, change records, payment schedule, permits, photographs and important messages. Name files clearly and keep the most current version obvious. This does not need to become a complicated management system. A shared folder and a simple decision log are often enough when everyone uses them consistently.
The file becomes valuable again at closeout. It can hold paint colors, care instructions, warranties, spare materials and information about concealed work. If a fixture needs service or an adjacent room is remodeled later, accurate records reduce investigation. Good documentation is part of the finished project because it helps the homeowner operate, maintain and build on the work with confidence.
Complete the final walk-through in two stages
The first review should happen when the project is substantially complete but the team still has tools and access to address corrections efficiently. Walk the room in normal light and operate moving or serviceable components. Review surfaces from normal viewing positions rather than inspecting only from inches away. Record incomplete work, corrections and questions in one list with responsibility and target dates.
After those items are addressed, complete a closeout review. Confirm cleaning, removal of protection and debris, return of keys, operation instructions, warranties, permit closeout when applicable and delivery of retained materials. Photograph the finished space and any concealed conditions documented during construction. Final payment should follow the agreed contract terms and completion process, not an improvised standard introduced at the end.
Plan for care after the project is complete
New work lasts longer when maintenance expectations are understood. For this project, the homeowner should receive guidance on ventilation use, grout and sealant care, drain access, fixture cleaning and periodic inspection of wet-area joints. Some materials have curing periods or cleaning restrictions immediately after installation. Others benefit from periodic adjustment, sealing or inspection. Record the product name and recommended method instead of relying on a general household cleaner.
The first weeks of use may reveal a minor adjustment that was not obvious during the walk-through. Ask how warranty questions should be reported and what information to include. A photograph and concise description are usually more useful than a vague message. Long-term care is not separate from design: materials and details should be selected partly on whether their required maintenance matches the household's real habits.
A complete preconstruction checklist
Before work begins, confirm that the written scope matches the approved plan, critical selections are documented, long-lead items are on hand or reliably scheduled, responsibilities for owner-provided products are clear and the budget includes a reasonable contingency. Confirm protection, access, working hours, communication contacts, utility interruptions, permit responsibility and the change-order process. Make sure every person approving decisions understands the same current documents.
- The room has been measured and important existing conditions are recorded.
- The scope includes preparation, related work and finish repairs, not only installation.
- Product specifications have been checked against the plan and site conditions.
- Allowances, exclusions and optional work are clearly labeled.
- The schedule reflects delivery, inspection, drying and curing requirements.
- The household has a practical plan for living around the work.
- Quality expectations and final review steps are written down.
This checklist cannot guarantee that an older home will reveal no surprises. It can ensure that surprises are handled inside a clear process. That is the central purpose of a complete scope: not to make the project look simple, but to make the decisions, responsibilities and sequence understandable before construction pressure makes them harder to manage.